Recently I changed my operating system from windows 7 to windows 10. This process has not been as smooth as I have expected. Each time I tried I was stopped by an error massage which was saying that windows cannot be installed to any of the drivers I have.
While trying to take care of this matter I formatted Drive C guessing that it would take care of the matter. But it made things far worse. I even lost windows 7.After trying for several hours I finally was able to locate the command prompt in the set up program.
I wanted to delete all my available drivers and make a raw partition area. Which I knew would be a solution. But I didn't know which commands to use. After struggling for hours I was able to catch the entire process.
The process is same for both windows 8 and windows 10.
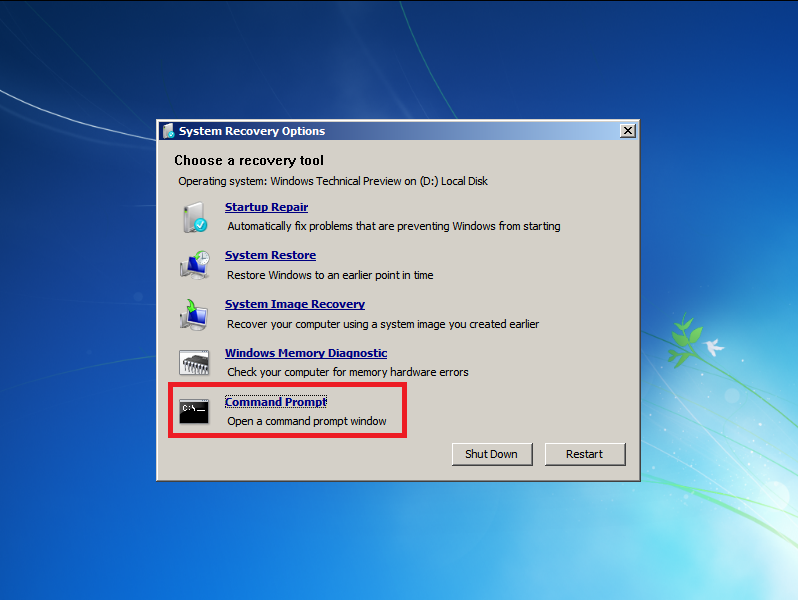
Go to "repair your computer" from the setup wizard and then choose advance trouble shooting option.
There you will see command prompt.
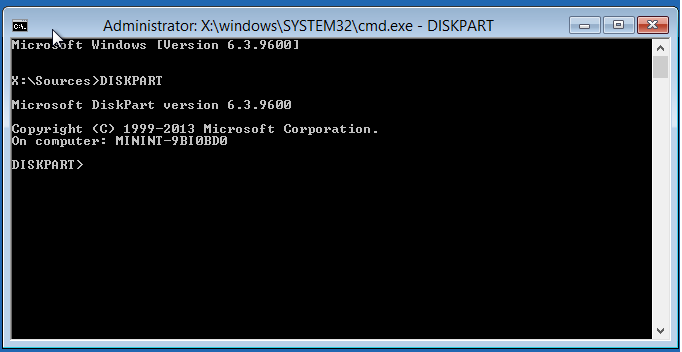
It shows like "x;/resources" .
then type "diskpart".
From here on I am going to use an article which I found from the internet while struggling to install windows.
"


While trying to take care of this matter I formatted Drive C guessing that it would take care of the matter. But it made things far worse. I even lost windows 7.After trying for several hours I finally was able to locate the command prompt in the set up program.
I wanted to delete all my available drivers and make a raw partition area. Which I knew would be a solution. But I didn't know which commands to use. After struggling for hours I was able to catch the entire process.
The process is same for both windows 8 and windows 10.
Go to "repair your computer" from the setup wizard and then choose advance trouble shooting option.
There you will see command prompt.
It shows like "x;/resources" .
then type "diskpart".
From here on I am going to use an article which I found from the internet while struggling to install windows.
"
Use of DiskPart to Clean the HDD/SSD
Use of DiskPart to Clean the HDD/SSD
Contents
- Introduction and Preparation
- Booting from Windows 7, 8.1 or 10 Installation Media
- Launching DISKPART from Windows 7, 8.1 and 10 Installation Media
- Launching DISKPART from the Elevated Command Prompt in Windows
- Use of DISKPART
This guide has a complimentary tutorial video.
Following the steps in the this guide will remove the partitions from your drive resulting in data loss.
Introduction and Preparation
This guide instructs in using DISKPART to clean any hard drives from Windows installation media.
This procedure is necessary if you get the error message during a Windows 7 or 8.1 installation:
We couldn’t create a new partition or locate an existing one. For more information, see the Setup log files
This
error message seems to be related to differences in GPT and MBR. For
example if MBR partitions are setup on the HDD and you try to install in
GPT. If you get this error message you can’t proceed so exit the setup.
To
proceed with this guide you will need either a Dell Windows 7
Reinstallation DVD, a Microsoft Windows 7 Installation DVD, Windows 8.1
with Update 1 or Windows 10 installation media.
Windows 7 installation media isn’t downloaded but Windows 8.1 and Windows 10 are:
You
need the Windows 8.1 or Windows 10 installation media to be prepared in
GPT (for a UEFI BIOS > 2012) or MBR (for a GPT BIOS <2010). For a
(2010-2011) you’ll need to see if the BIOS has been updated to support
UEFI.
Booting from Windows 7, 8.1 and 10 Installation Media
Power down your computer. Hold F12 while powering up your computer (at the Dell BIOs screen).

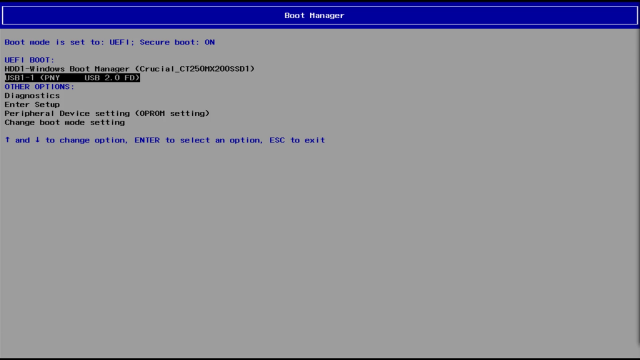
Variant A: UEFI Boot
If
your system is newer than 2012 its recommended to use a UEFI Boot and a
GPT partition scheme; this is faster and more reliable. The boot
manager should mention a UEFI Boot similar to below.
Note UEFI may not work with a DVD and you should Install from a USB.
Press the ↓ arrow and select your Windows 8.1 Bootable USB Flash Drive and press [Enter]
See Use of DISKPART
Variant B: Legacy Boot
For
systems older than 2012 you will have to just use the legacy boot with
the MBR partition scheme which will be listed by default. There will be
no mention of Legacy or UEFI Boot but the boot option will be legacy.
If
you wish to install Windows 8.1 32 Bit (unrecommended) on a 2012 or
later system you will need to disable SecureBoot and enable legacy boot
options.
Press the ↓ arrow and select your Windows 8.1 Bootable USB Flash Drive or DVD and press [Enter]
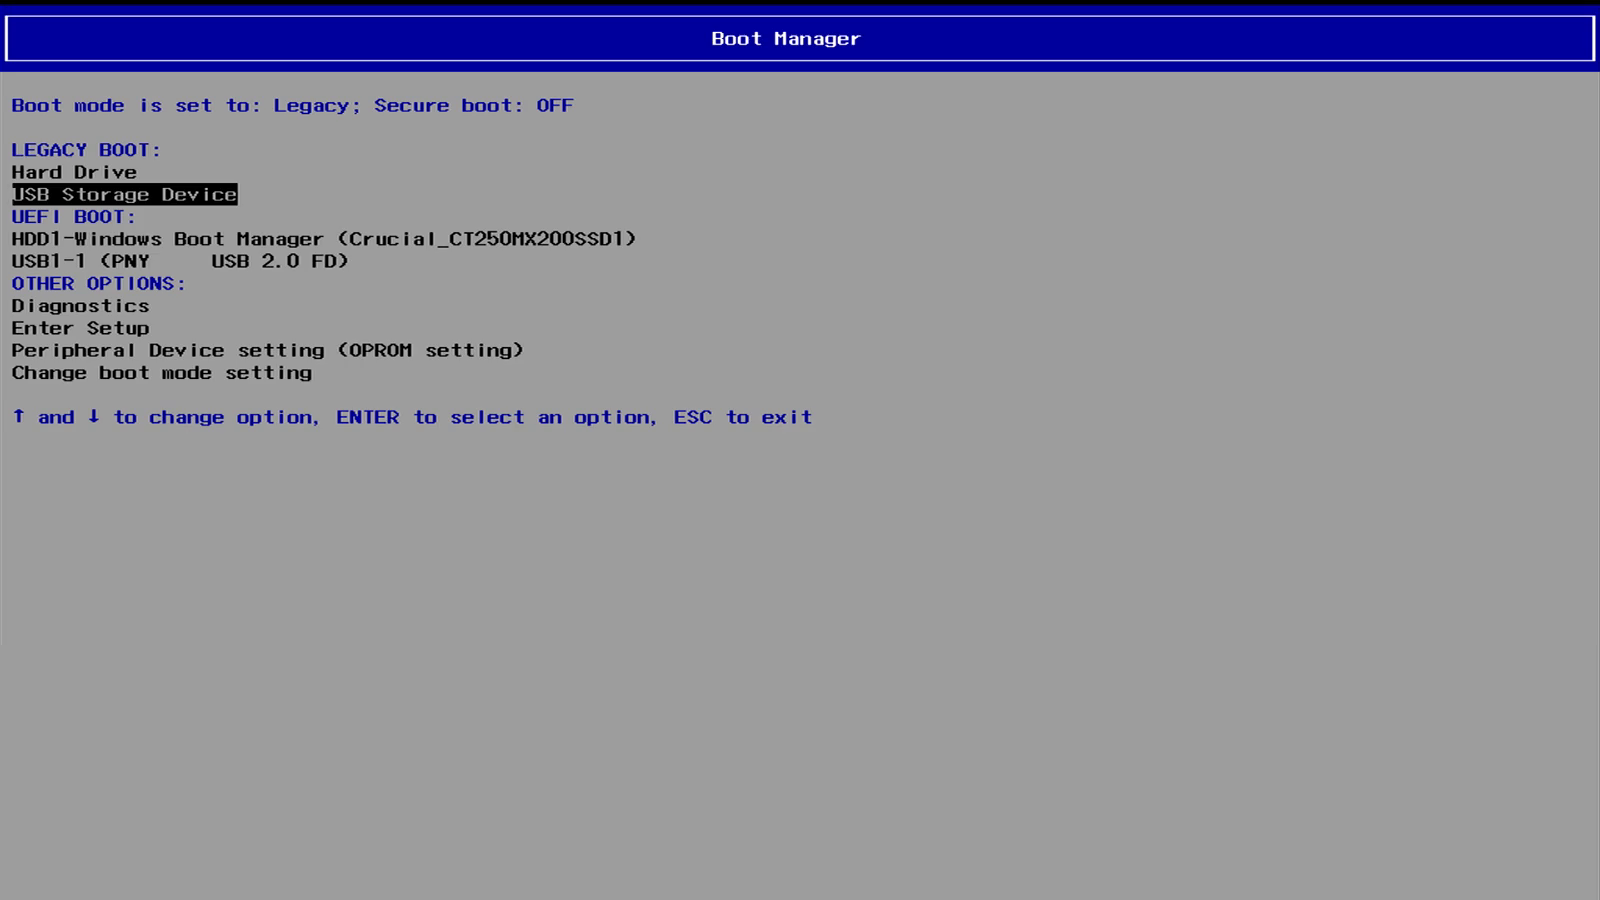
Select boot from CD/DVD or from USB respectively.
Press any key when prompted such as “h” when it says Press any Key to boot from CD/DVD.
See Use of DISKPART
Launching DISKPART from the Command Prompt
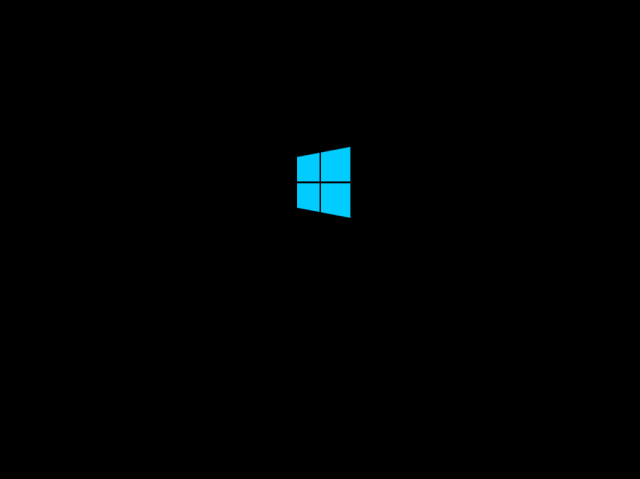
You will get a black screen that says Windows.

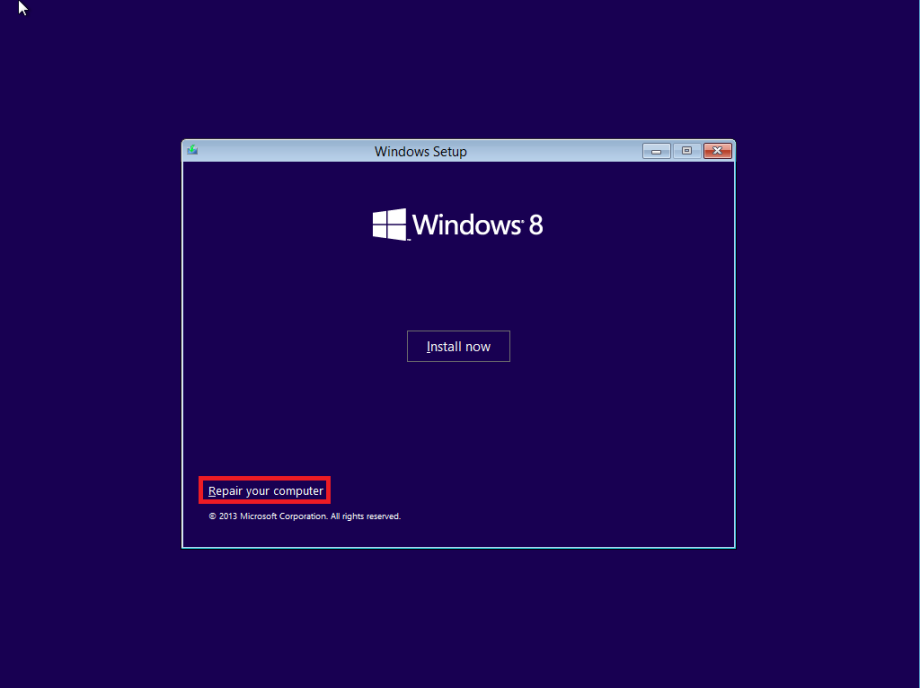
Change the Time and Currency format and the Keyboard to your desired country. When ready select next.

Now select Repair your Computer.

The following screens differ slightly for Windows 7 and Windows 8.1.
Windows 8.1
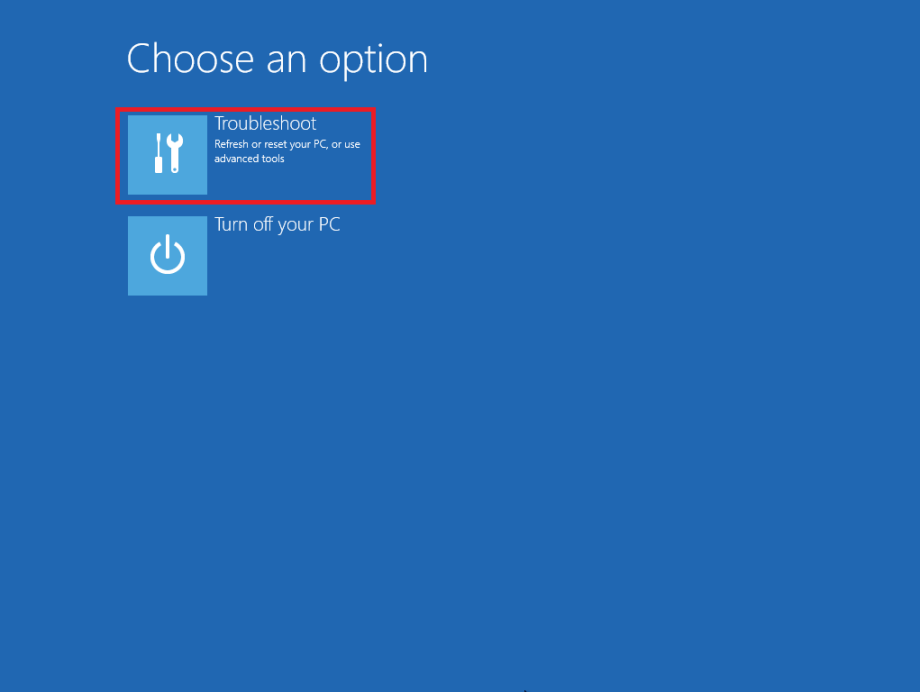
Select Troubleshoot.

Select Advanced Options
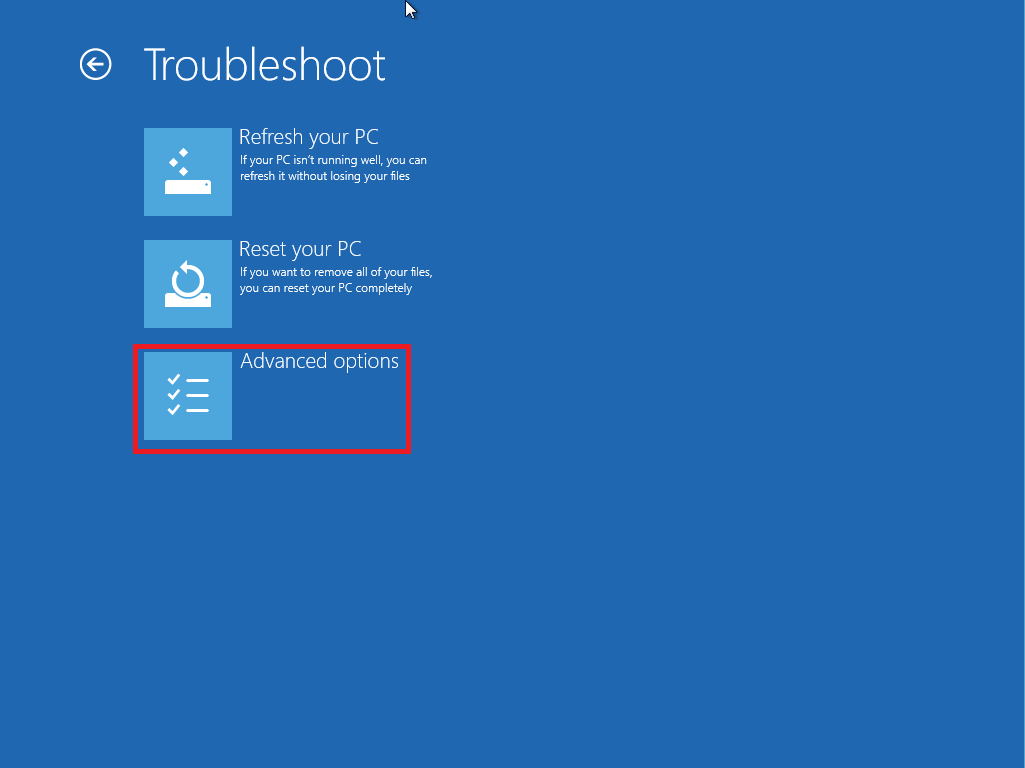
Select Command Prompt

Proceed to using DISKPART
Windows 7
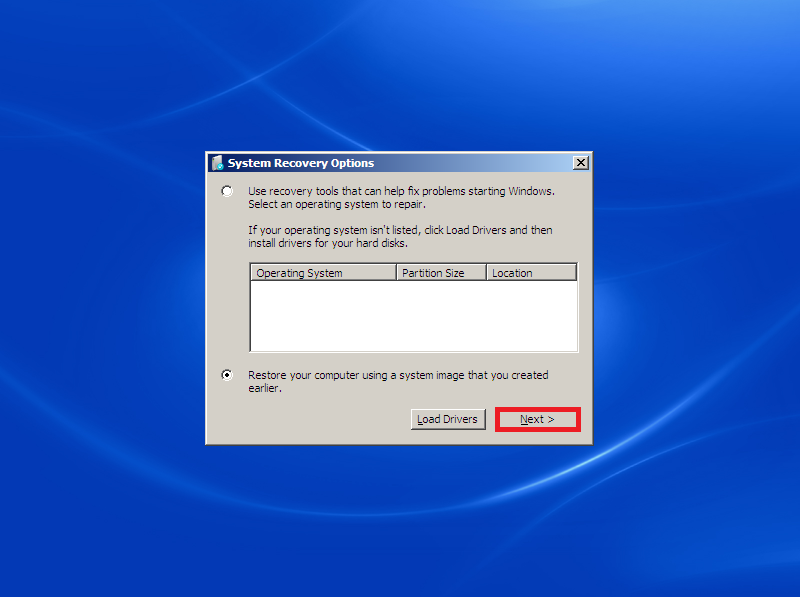
Windows 7 will search for previous installations.

Once its found one, highlight it and select next:

Alternatively if its not found, select next.

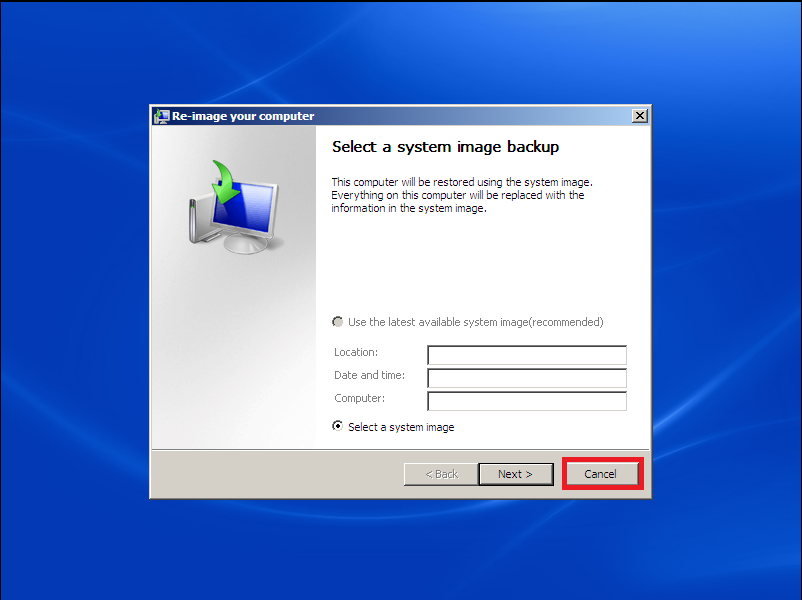
Select Cancel when it looks for a system image:

Select cancel again:

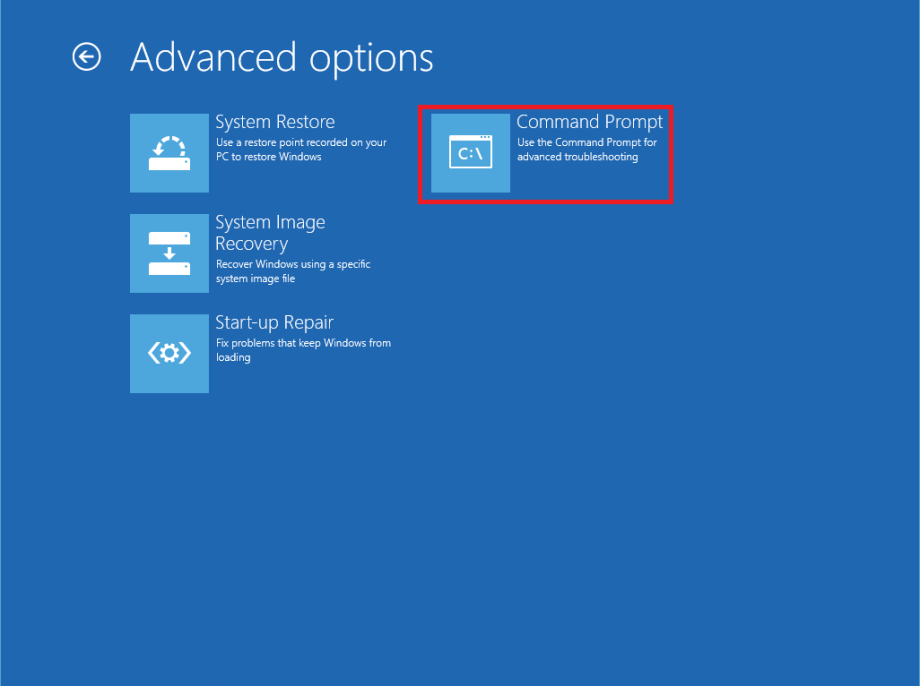
Select Command Prompt:

Proceed to using DISKPART
Launch of DISKPART from within Windows
The following instructions are different for Windows 7 and Windows 8.1
Windows 8.1
Right click the Start Button and Select Command prompt Admin.

The elevated command prompt will then open:
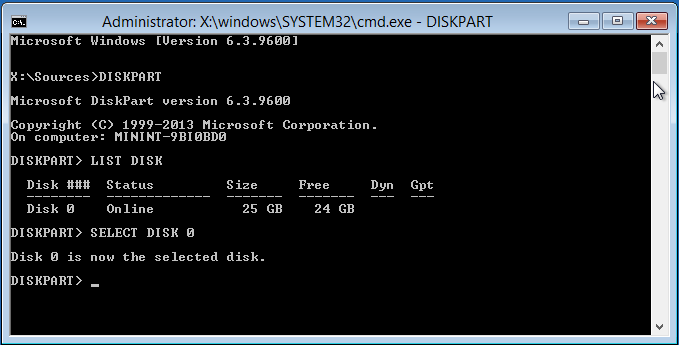
Type in DISKPART and press Enter.
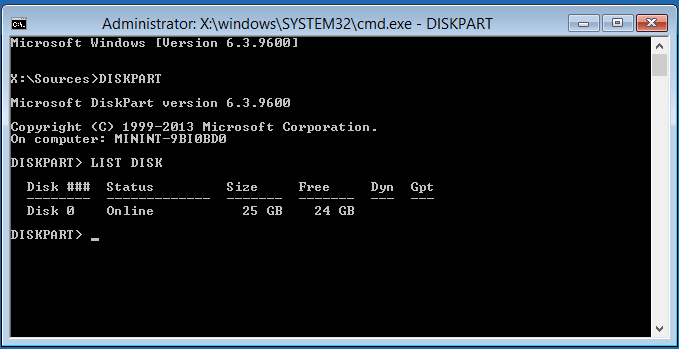
Type in LIST DISK and press Enter.

See Use of DISKPART
Windows 7
Select the start button and search for cmd:

You will see cmd listed under programs, right click it and select run as administrator:

The elevated command prompt will then open:
Type in DISKPART and press Enter.
Type in LIST DISK and press Enter.
See Use of DISKPART
Using DISKPART
Type in DISKPART and press [Enter]

Type in LIST DISK and press [Enter]

I
only have one Disk listed in this example for simplicity so the only
choice for me is to select it. The Bootable USB will also be listed as a
Disk and you should be careful not to select this by accident.
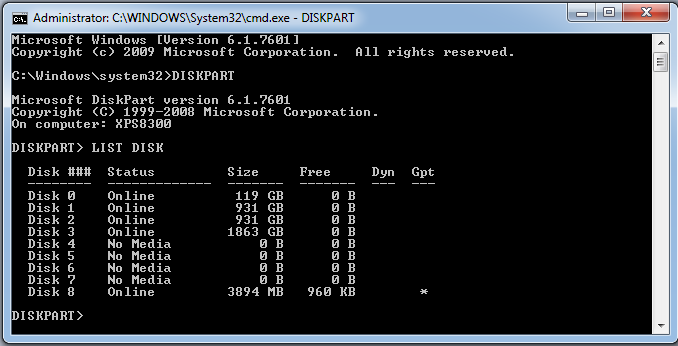
For a more complicated configuration there may be multiple disks for example on my XPS 8300.
- DISK 0 = 119 GB = 128GB Crucial M4-CT128M4SSD2 (SSD Boot Drive)
- DISK 1 = 931 GB = 1 TB Hitachi HD721010CLA332 (Data HDD 1)
- DISK 2 = 931 GB = 1 TB Hitachi HD721010CLA332 (Data HDD 2)
- DISK 3 = 1863 GB = 2 TB SeaGate Expansion Desk USB Device (External Hard Drive)
- DISK4-DISK7 = Empty Card Reader
- DISK8 = 3894 MB = 4 GB USB Flash Drive (Windows 8.1 USB Flash Drive)

Type in SELECT DISK X where X is the disk number, in the case of my simple example SELECT DISK 0 and press [Enter]

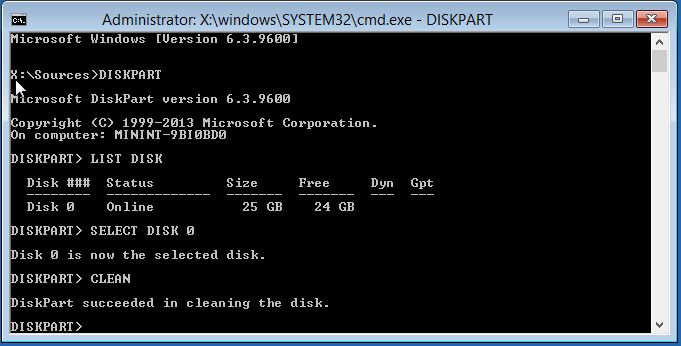
Type in CLEAN and press [Enter] or CLEAN ALL and press [Enter].
-
CLEAN removes all partitions and assigns them as unallocated and is recommended for a Solid State Drive. This allows for the recreation of partitions but is not a through wipe. If you want to wipe for a SSD you will need to use a utility like Magic Parted.
- CLEAN ALL writes zeroes to the entire drive and is recommended for a Mechanical Hard Drive. This will take some time to carry out as you are not just removing partitions and assigning data as “free space” like in CLEAN but physically overwriting this “free space” to effectively remove all the data from the drive. CLEAN ALL is not recommended for a SSD as data is continuously remapped across the SSD Drives surface and a cleaning algorithm like this doesn’t work correctly and may reduce the SSDs lifecycle.

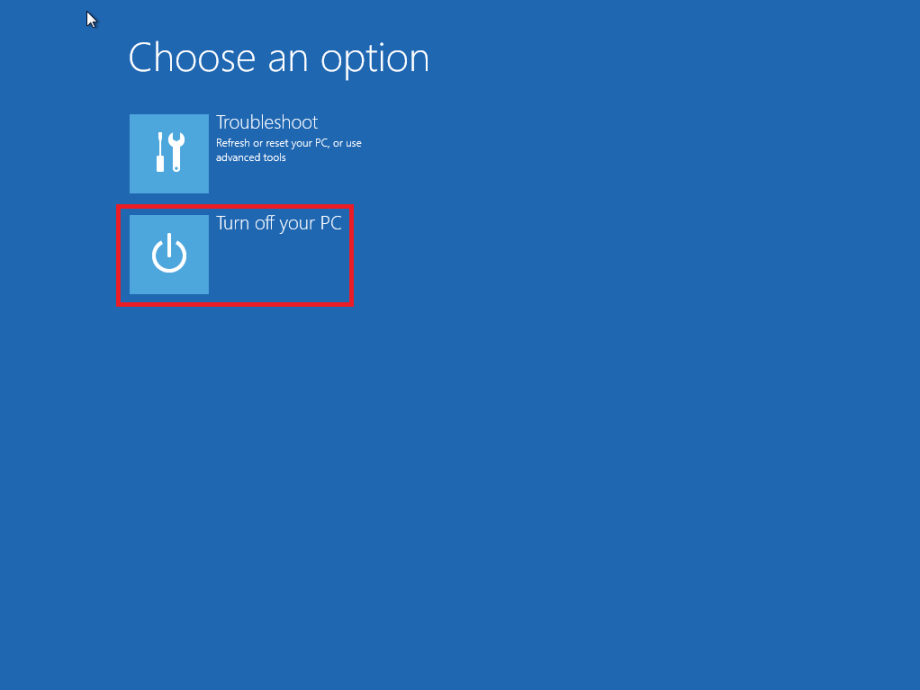
Close down the command prompt by pressing the [x] at the top right.
Alternatively type in EXIT and press [Enter] to Exit Disk Part. Then type in EXIT and press [Enter] to exit the Command Prompt.


Select turn off your PC

Turn back on the PC and begin your install… See Windows 8.1 Installation.
Solution taken from here but images added for clarity:
Part at the end of the Technet solution was unnecessary and caused hassles with a UEFI install."
Well ,,,,,
Thats it. Remember this is very important and useful process.
No comments:
Post a Comment